 Note: When using frozen fruit, a quick stovetop prep (and a chance to cool) helps curb runaway juices that make the crust soggy. Prep the filling first and let it cool completely before putting together the galette. It’s also a good idea to let the assembled galette chill in the fridge for about 20-30 minutes before you bake it. It tends to hold its shape better that way.
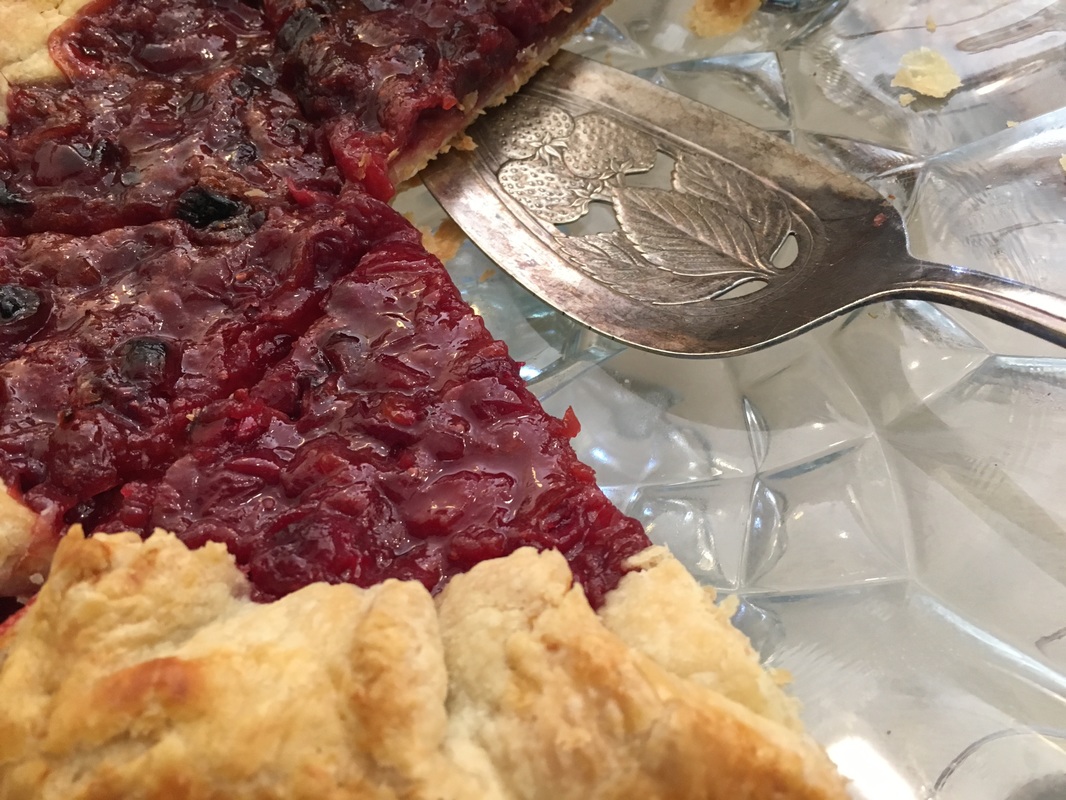
Filling for one 10” galette (adapted from Kate Lebo with a few tweaks) 2½ cups pitted, frozen sweet cherries (Trader Joes is a good source) 2 cups fresh or frozen cranberries, rinsed and picked over for stems ½ cup dried tart cherries 1 cup granulated sugar 2 tablespoons brown sugar pinch of salt ¼ teaspoon cinnamon ⅛ teaspoon freshly grated nutmeg ⅓ cup flour 1 tablespoon fresh orange juice 2 tablespoons unsalted butter cut into ½” pieces egg wash made from one egg yolk beaten together with 2 tablespoons milk or cream coarse sugar for sprinkling Place the cherries, cranberries and dried cherries in a large bowl. In a medium sized bowl, whisk together sugar, brown sugar, salt, cinnamon, nutmeg and flour. Add the sugar/spice/flour mixture to the fruit and stir to combine using a rubber spatula. Scrape the filling into a heavy bottomed saucepan and cook over medium-low heat, stirring to prevent sticking until the mixture thickens, about 8-10 minutes. Remove from the heat, add the orange juice and butter, stirring to combine. Scrape into a bowl and set aside to cool, then cover and refrigerate until completely cold. Pastry for one 10” galette ¼ cup sour cream 1 tablespoon freshly squeezed orange juice ¼ cup cold water 1¼ cups all-purpose flour ½ teaspoon salt 1 teaspoon sugar 1 teaspoon orange zest ½ cup (1 stick) cold butter, cut into ½” pieces In a 2-cup spouted (liquid) measuring cup, whisk together sour cream, orange juice and cold water. Place this in the fridge to stay cold. In a medium bowl, whisk together the flour, salt, sugar and zest. Cut the butter into the dry ingredients using a bench scraper or your fingertips, until the mixture is crumbly. Remove the measuring cup with the liquid from the fridge and gradually add all but two tablespoons of it to the butter/flour mixture. Use your fingers to combine the liquid with the dry until you have a soft dough that just holds together. If it holds together nicely, then you’ve added enough. If it feels a bit dry, add the remainder of the liquid. Gather the dough into a disc, flatten it and wrap it in plastic wrap. Refrigerate for at least 1 hour before rolling out. To prepare the galette: Preheat the oven to 425 degrees F. On a lightly floured sheet of parchment paper, roll out the chilled dough into a circle about 14” in diameter and about ⅛” thick. Transfer the parchment paper with the dough onto a rimmed baking sheet. If the parchment hangs over the edge of the baking sheet, trim it or tuck it under to fit. I like to take a 10” cake pan or tart pan, place it in the center of the pastry and carefully trace around the 10” circle with an offset spatula to mark the area where the filling will go. (You can eyeball this- it doesn’t have to be perfect, but for those of us who struggle with coloring within the lines, it helps.) Remove the cold filling from the fridge and spread it evenly within the 10” circle. This will give you a nice, even border of dough. Fold up the pastry border every three or four inches, creating a ruffly edge of dough, leaving the fruit mostly exposed. Brush the edges of the galette with the egg wash and sprinkle with the coarse sugar. Place the baking sheet with the galette back in the fridge to get cold, about 20-30 minutes. Place the chilled galette on the middle rack of your pre-heated 425 degrees F. oven. Bake for 20 minutes, then reduce the heat to 375 degrees F. and continue baking for an additional 30-40 minutes, until golden and the juices are bubbling. Cool on a rack for about an hour before slicing.
0 Comments
Leave a Reply. |
Archives
July 2024
|
 RSS Feed